

Account Manager Guide
Individual Day Transfer
2
Click on the person icon located at the top right corner to sign in.


3
Sign in using the email address and password that was used when purchasing the tickets.

If this is your first time using Rocket Classic Account Manager and you do not have a Ticketmaster account, click 'New to Ticketmaster? Sign Up' near the top of the page. Follow the prompts to create an account.
If you do not remember your password from previous years, click on 'Forgot Password' button to reset it.
If you receive a message that says, 'It looks like you already have an account,' please login with that email address and your password (or follow the steps to reset the password, if needed).

4
Once you are signed in, click on the three bars in the upper left-hand corner.

5
Click on 'My Events.'


6
On the 'My Events' page, you will see your tickets seperated out by day. Find the day you would like to transfer and click 'View Event Details'.


7
Once on the individual day page, click the three dots labeled 'More'. Click the 'Transfer' icon.


8
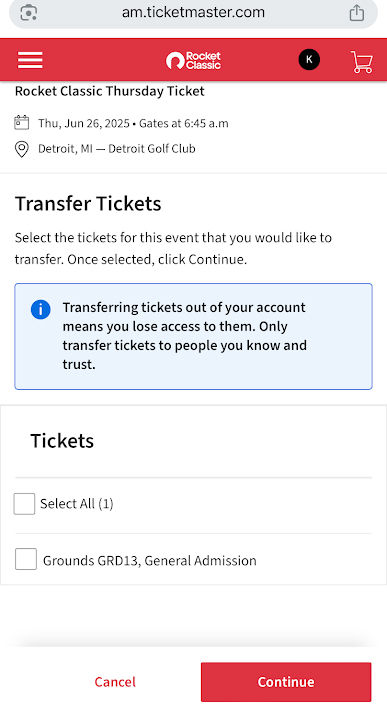
Select the box(es) corresponding to the tickets you would like to transfer. Once selected, hit 'Continue'.


9
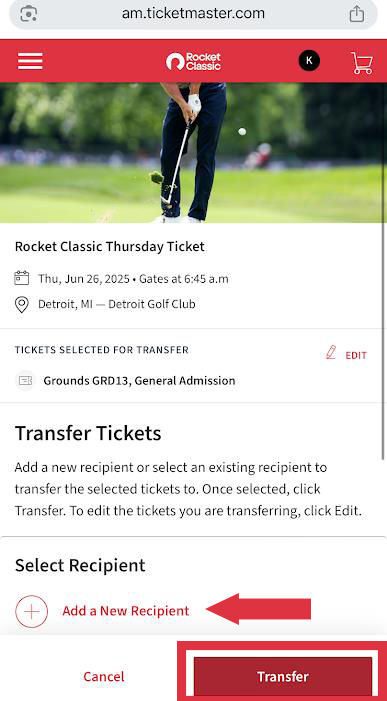
Select the recipient from the list. If they are not there, click 'Add Recipient'. Once added, hit 'Transfer'.
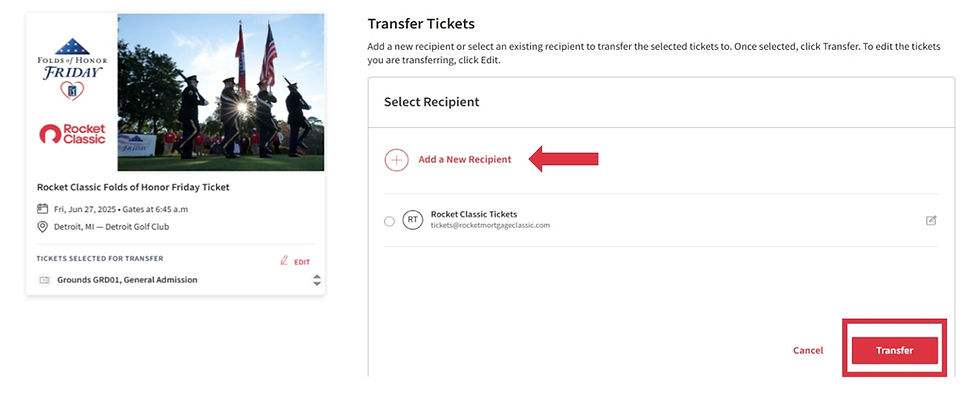
It is easier for us to asssist if you transfer it via email.

10
Once successfully transferred, you will get a confirmation on the screen, as well as via email. You will be notified when the tickets are accepted. If you need to cancel a pending transfer, simply click on the 'Cancel Transfer' button on the appropriate tickets. Once they are claimed, you can not cancel the transfer.


The transfer recipient will receive an email asking them to accept your ticket offer. Once they accept the transfer, you will receive an email confirming the tickets have been successfully transferred. Once the recipient accepts the tickets, they will no longer be available in your account.